
Cropping an image is one of the essential things.
It drags the interest of the viewer to certain points and guides the viewer through the story you want to tell.
Decide the size
In an ideal case, you composed the photo already as well as possible. Take your time to think before you take a photo of what you want to do with it later. Should it be printed? In which size? All these parameters before, decide in the end how the image will be.
For example. If you want to have a print of it in 40x60cm the aspect ratio of your raw image should be 2:3, and an aspect ratio of 16:9 will crop away a lot of the image and maybe the image loses the interesting story in it. You can adjust this in the settings of your camera. I also suggest shooting in raw to get the maximum quality out of your camera.
Let’s go through the process. To crop an image open the photo in photoshop. For cropping, press C on your keyboard or choose the cropping tool in your toolbar. Once you are done with the cropping click the check mark and the image is cropped. Let´s go through the cropping in detail:

As you can see, the image above is in a different aspect ratio taken. The cropping to get it to a print size of 40x50cm will take off a lot of the spaces on top and bottom. The subject will get closer and may lose the visual guidelines.
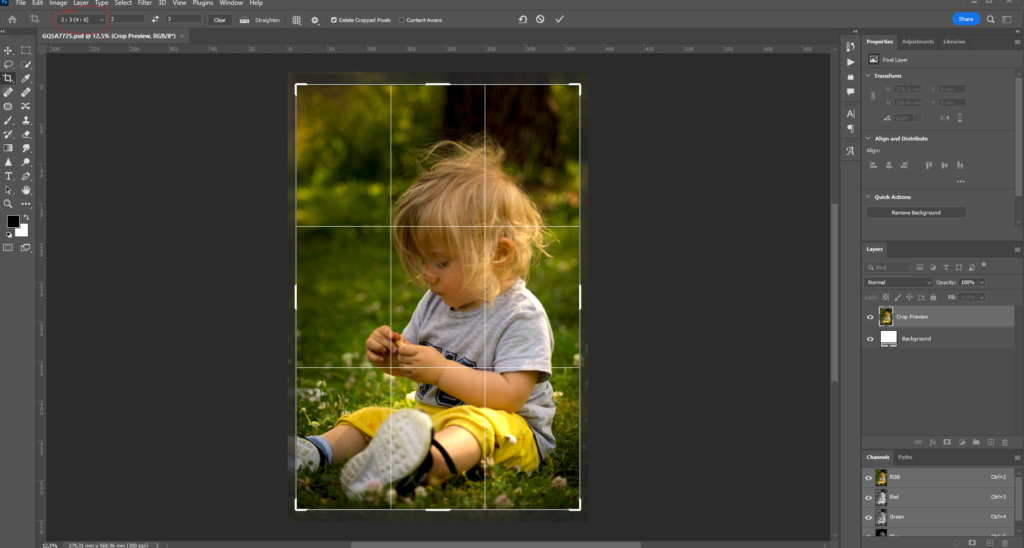
As I took this photo of my son in an aspect ratio of 4:6 the cropping with 2:3 also works fine. it would take off evenly the sides and the original aspect ratio stays intact.
The “rule of thirds”
The next thing to take into consideration with the cropping is the points of interest. Photoshops cropping tool comes with the handy grid preview. on the meeting points of the grid are the third points. The points are matching the “Rule of thirds”. These points are psychologically known as points of specific interest. More about the Rule of Thirds you can find in a tutorial later.
Sometimes it is interesting to break these rules, but in the beginning, they are a good anchor point to build your visual story. I tried to keep my sons’ feet on the lower left and the head on the upper right. Like this, the eye of the viewer magically wanders along this path and goes through the image in the direction head. Don´t overload your images with too many elements in a wild order. It only distracts from the main interest point and the viewer will lose or miss the point and the story of the image. More about composing a photo you can find in later tutorials.
I hope you liked this tutorial, you can subscribe to my mailing list to get the latest updates and newsletters.
Happy shooting,
Sebastian